 I
haven't gotten to the greatest part of all yet: The installation of the
fuel tank and engine...there's still enough to do that would easily fill out
another web page or two...but the time is becoming closer....
I
haven't gotten to the greatest part of all yet: The installation of the
fuel tank and engine...there's still enough to do that would easily fill out
another web page or two...but the time is becoming closer....The Continuation of a Quickie Paint
Job....
Re-Assembly Page 2
Clara (1966 Westphalia)
15-Mar-01
 I
haven't gotten to the greatest part of all yet: The installation of the
fuel tank and engine...there's still enough to do that would easily fill out
another web page or two...but the time is becoming closer....
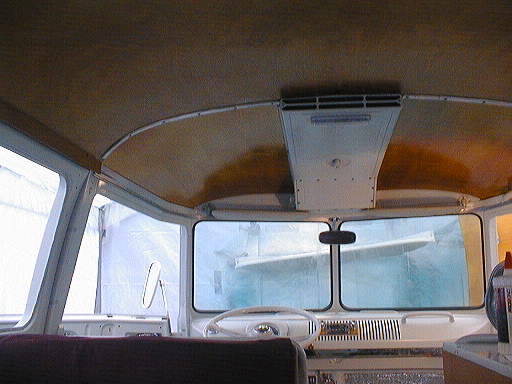
I sprayed the roundel today, as that is the only thing keeping me from installing the kick panels that I painstakingly (but not unerringly) made from "improper" 1/8" birch plywood. I found that amber-colored lacquer (yes, the sticky goo that is made from the excretions of the lac bug) blends the new panels with the old quite well, and also makes the pink formica look more like something not "pukey." So here's a pic of the ceiling panels (check back at Reassembly1 to see the difference):
It was not a small matter for me at all when I considered the audio replication aspects of this project. Although I really do enjoy groovin' to the howl of a badly worn transaxle or the roar, clatter, and rumble of a Transporter in action, I could not justify spending $20-$40 for a piece of metal to block off that (uncut) hole in the dash. So I paid $150 for a "Custom Autosound" AM/FM Cassette deck which fits nicely in the opening provided for such a purpose. With a section of oak trip, and 4-5 hours of labor, I had installed it in the dash, and then after that, I worked the speaker and power connections in...
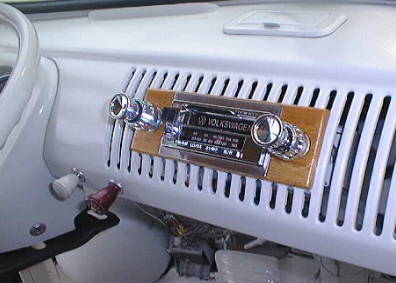 The speaker wires for the
front were easy, and the rears were brought in through one of those handy holes
at the bottom of the lip in front (right next to the main wiring harness,
there's another hole that was filled with seam sealer gunk....I ran Monster
4-conducter up through it, and loomed it into the stereo harness with bullet
connectors and nylon wire wrap.
The knobs will be replaced someday with stock or similar ivory colored things, or I might just make them out of oak.
A friend noted that the wiring shot looked like a Gemini spacecraft
interior...where's the floating pencil? So... 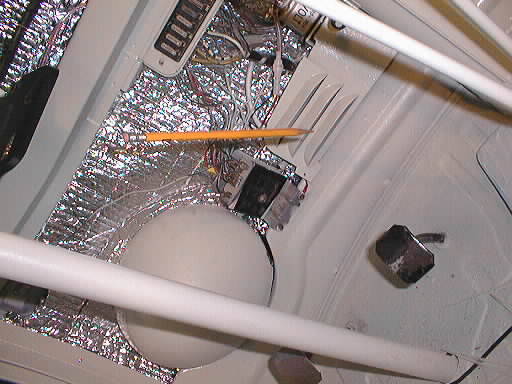
I'll be running the rear speaker cable along the underside, and up through a hole somewhere into and through the cabinets and then to the speakers themselves which are to be mounted on the front of the upper cabinet.
While I was wiring things up, I installed another 12v positive and a ground in a twisted pair to a set of bullet connectors for future accessory use. (Probably a CB)
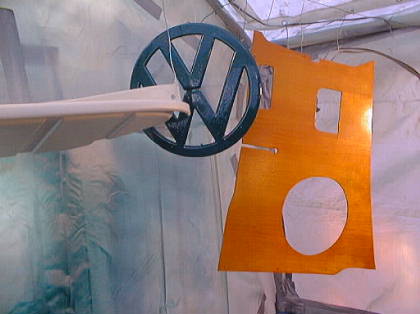 Here's
the roundel, which I finished spraying yesterday. You'll not that it is
"textured"! Well, that is just to prove that it is the real
one! I blasted it to clean off the old paint, failing chrome, and rust,
and then gave it a coat of POR-15, and about five coats of aerosol
scratch-filling primer. To hell with the rust pits! I think it looks
cool, and no repro can even come close!
I had also threaded the studs on the back, and hopefully, I'll be able to get my fingers up to the top one when I go to screw the nuts and washers on!
Note the beautiful parcel tray and soon-to-be-installed kick panel!
Next up: I have to decide which set of front-door window frames to use! Mathilde's (pictured) are in much better shape than Clara's, and the new seals are screaming at me to install them, so I may just use the better ones. I'll preserve all I can of that original paint, and just clean/Rust-Mort/Prime the ugly bits.
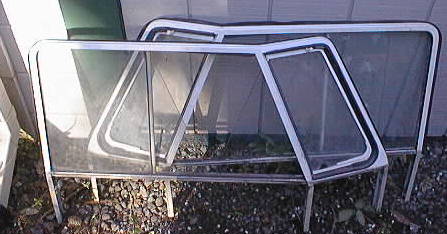
Then there's those jalousie windows.....does anybody know how I can replace these bits? They go on the inside to the right and left of the rotating parts, and they probably help seal the windows, as well as providing a friction buffer...

And the frames themselves: Michele had sanded the holy living tar (and bugs and oxidation) out of them, and then (as per my instruction) cleaned them with denatured alcohol and coated them with Restomotive Labs' "Glisten PC". Which didn't work. According to the guy at RL, I should have used Marine=Clean and then a special surface prep solution before using the Glisten. So...after that stuff arrives, I'll go at it again...starting with stripping the frames of the botched GlistenPC. Michele has had it with those!

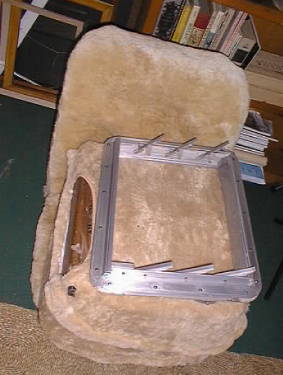
And on and on it goes....
Progress 1 Progress 2 Progress 3 Paint 1 Paint 2 Paint 3 Interior 1
Shop Compressor Booth 1 Booth 2 Booth 3 Blast Cabinet Reassembly 1
Bartholomew ('60 Crewcab) Mt. Shasta Trip Report Links page
mizamook@sonic.net (Gene)