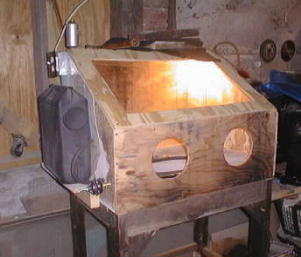
 After visiting
Harbor Freight and looking at their blast cabinets, I decided that it would be best if I
made my own, so I used the old plywood from Clara's floor, some aging 2x4's that I had
lying around, and my existing sandblaster.
After visiting
Harbor Freight and looking at their blast cabinets, I decided that it would be best if I
made my own, so I used the old plywood from Clara's floor, some aging 2x4's that I had
lying around, and my existing sandblaster.Yet another page in the Transporter Fixin' Chronicles.....
The Blast Cabinet links at page bottom
 After visiting
Harbor Freight and looking at their blast cabinets, I decided that it would be best if I
made my own, so I used the old plywood from Clara's floor, some aging 2x4's that I had
lying around, and my existing sandblaster.
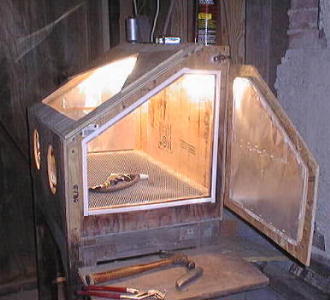
The bottom of the cabinet is concrete reinforcing mesh, and the window is a piece of 1/8" Plexiglas that I've had in a corner for years.....of course, by the time I'd used the cabinet for half an hour, my suspicions that the Plexi wouldn't stand up to the abrasion were confirmed....I'll be replacing it with glass soon.
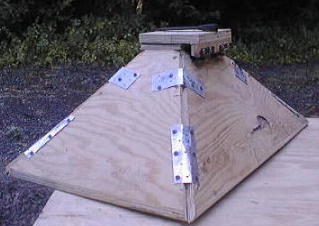 Here's
a shot of the completed recovery hopper. Of course, one of the main reasons for
building this cabinet in the first place, besides dust and noise control, is being able to
recover media. Should I ever decide to use something other than sand for
blasting, I'll be able to recover most of it for re-use. The latch is a simple
rubber bungee.
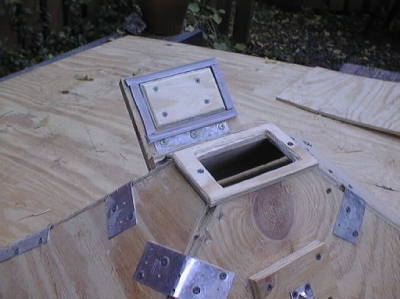
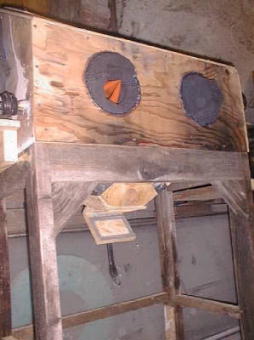 The recovery hopper
installed. I sealed it with hot glue and spray foam. The gloves are heavy
plumber's gloves with old Levi's sewn onto them and then attached to the hole perimeters
with staples and hot glue. I'll be sealing the denim with flexible plastic spray,
and they should last a season at least...we'll see.
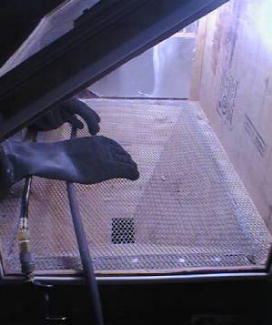
The compressed air, sand inlet, and electrical are all supplied through the left side. I can remove my sandblaster from this unit in a matter of minutes, and use it outside. At some point, I'll get another blaster, so I can leave a dedicated gun in the cabinet.
By this next picture, you can see how I had to put shades on the upper corners of the viewport, as my original idea to install fluorescent lights along the upper side edges was not to be due to difficulty in finding lights of the right size, and the twin incandescent fixtures caused quite a bit of glare. When I replace the Plexiglas, I'll also install a redesigned viewport panel to alleviate this problem. There is aluminium flashing on the inner sides and front to help reflect and focus the light into the working area.
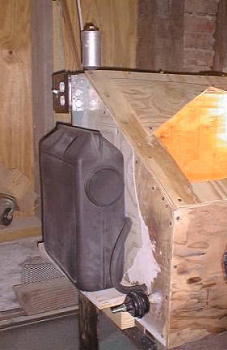
That canister on the upper left edge over the electrical box is a Peugeot fuel filter.....I was thinking that it would make a good air exhaust port...I still don't know if it's doing anything...what I should probably do is create a fan-driven, multi-filtered exhaust/vent that is ported through the wall behind the cabinet. This would allow me to get rid of airborne shattered media dust, and with a collector, I could control its disposal.
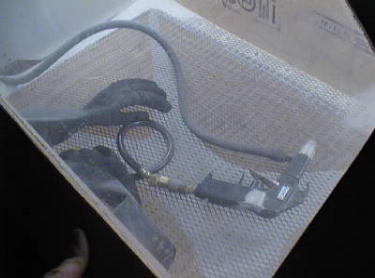 After the first use. The recovery hopper works well. The shape the hatch at
the bottom, and the fact that I used double cabinet hinges allows the spent media to be
poured quite neatly into a bucket or sack, with the door sealing edges easily cleanable.
The inner perimeter ledge, which I tried to minimize, collects sand which must be blown off prior to recovery, but this is not a big problem.
The concrete reinforcing screen is fine enough to hold most small fasteners, and strong enough to support the weight of the objects to be blasted, and also to maintain its integrity after years of blasting.....
I still use a respirator with this cabinet, as breathing shattered silica dust can make one's future a bit uncertain...
Progress 1 Progress 2 Progress 3 Paint 1 Paint 2 Paint 3 Interior 1
Shop Compressor Booth 1 Booth 2 Booth 3
mizamook@sonic.net (Gene)